Step 1 Installing Boost Cloud Application:
Before we walk you through the submission process, you will first of all need to install the Boost Cloud Application - It allows you to automatically upload source files and download rendered files through Render Boost fast and secure servers.
- Here is a video tutorial that will walk you through the Boost Cloud Installation process.
Download Boost Cloud Installer for Mac-Windows
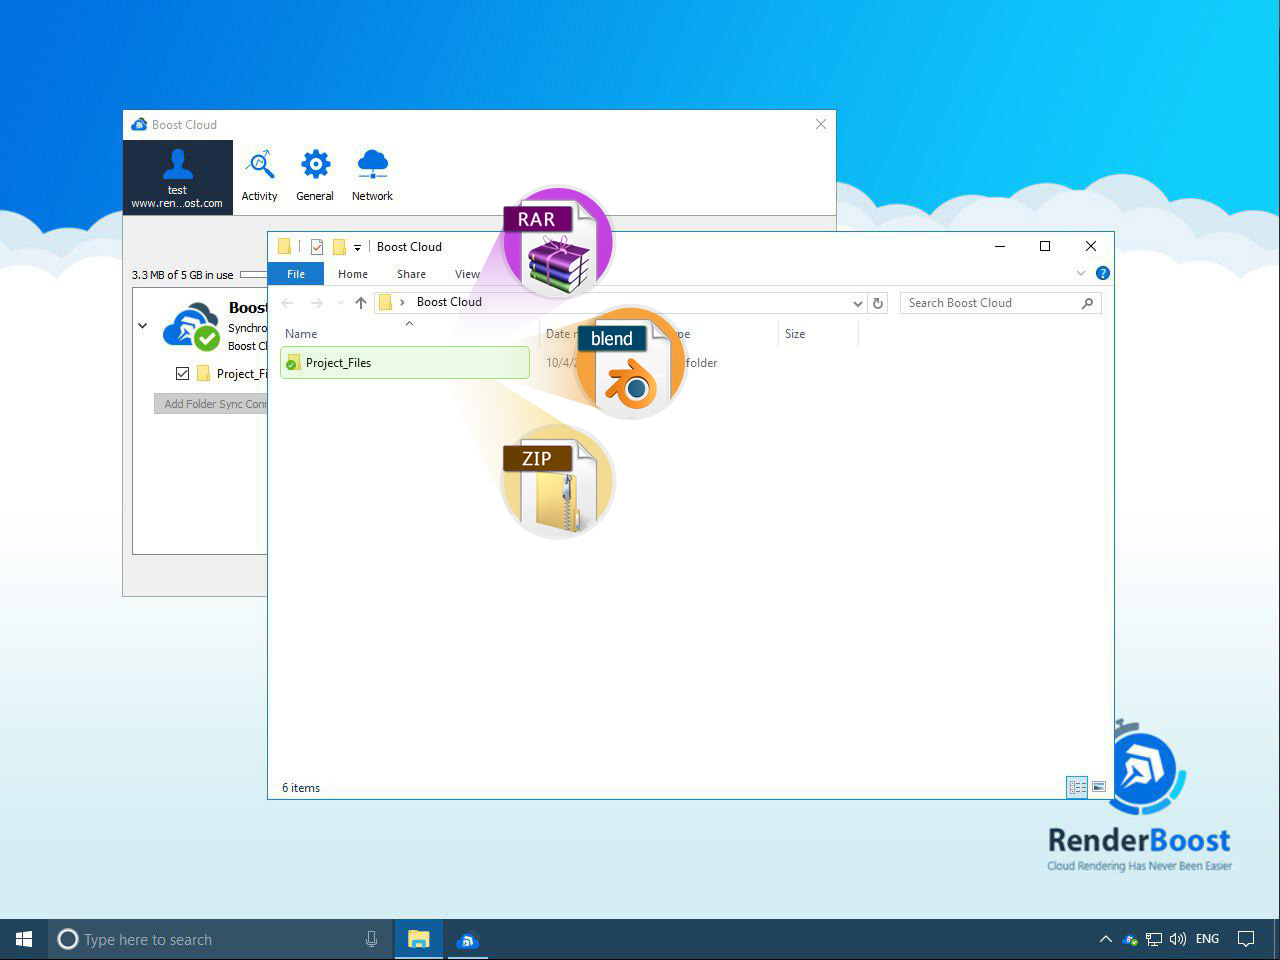
Once you have finished installing Boost Cloud, you will need to log into the app using your log in details. To open Boost Cloud folder, right click on Boost Cloud Icon on system tray and select “Open Folder “ Boost Cloud “”. Within this folder, there will be a sub-folder with the name “Project_Files:” This is where you should put the source files you wish to be rendered. Your files can be archived or native application scenes.

Please re-create a new folder in Boost Cloud root folder and re-name it to “Project_Files”.
Step 2 (Packaging Scene Files)
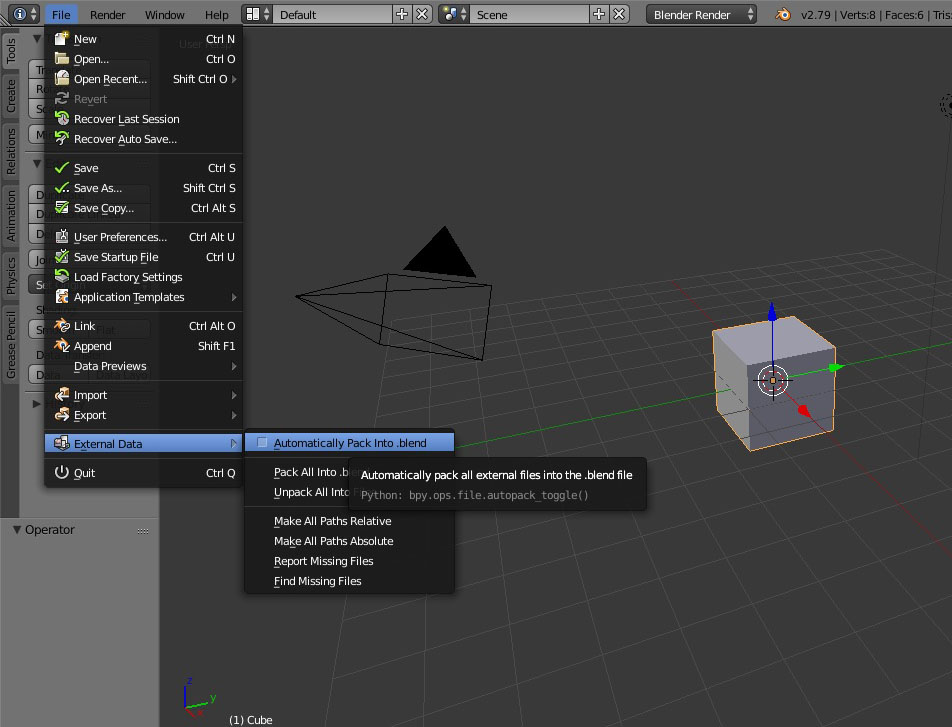
Files that are supported for this software are files with “.blend” extensions. If you have projects that have to do with texture maps or other external stuff you should turn on “Automatically Pack into .blend”.
How to Archive Blender Scene?
Open “File” Menu go to "External Data" and select “Automatically Pack into .Blend” and then "Save " your scene, for large projects we strongly suggest to you pack files into RAR instead of ZIP file.
You should also know that you can place more than one .blend file into the RAR/ZIP package and submit them separately through the submission page.
Step 3 (Submission):
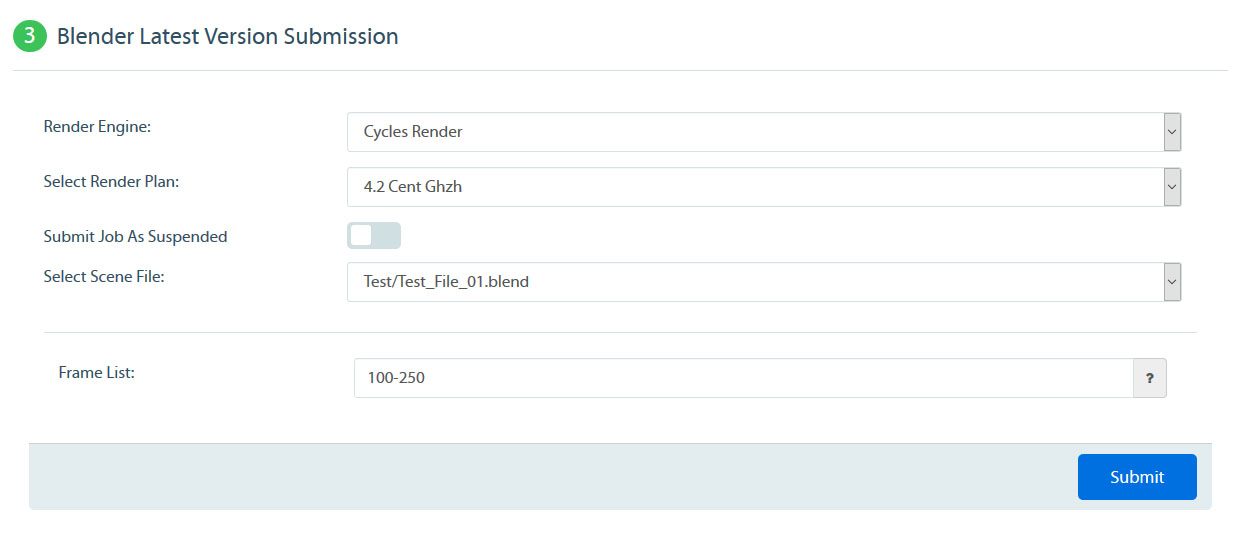
The first thing you need to do is to log in to your user panel. Then, select Blender render farm(automate farm)submission and choose your version of Blender – this should be based on your file settings.

The following essential submission inputs below are required. You should endeavor to fill them out carefully according to your rendering demands. The advanced option gives you more control and management over the submission process.
Job Statuses (Monitoring):
After successfully completing the above requirements all you need to do is to lean back and monitor the rendering progress.
Below is a list of relevant job status that will tell you what’s happening at each stage;
Initializing
To make sure that your data is secured, we utilize a transferring server. This server, first of all, encrypts project files before distributing them to our render servers. This process might take longer if you are submitting larger files.
Rendering
This label shows your project rendering. You can see the results in the Boost Cloud folder. All rendering results are simultaneously synchronized to your machine. You can also see the progress within your user panel.
Suspended
As a user, you can suspend your job whenever you want. Our system can also put a hold on rendering if you run out of Boost Points.
When a render job is suspended, it means no new task will get started but already running task within the render farm will be rendered entirely and charges will be applied.
Failed
There are lots of technical reasons that can cause a rendering to fail. If you see the “Failed” status, kindly contact us using the report button. You can also use the live chat support for a quick assistance and troubleshooting.
Step 1 Installing Boost Cloud Application:
Before we walk you through the submission process, you will first of all need to install the Boost Cloud Application - It allows you to automatically upload source files and download rendered files through Render Boost fast and secure servers.
- Here is a video tutorial that will walk you through the Boost Cloud Installation process.
Download Boost Cloud Installer for Mac-Windows
Once you have finished installing Boost Cloud, you will need to log into the app using your log in details. To open Boost Cloud folder, right click on Boost Cloud Icon on system tray and select “Open Folder “ Boost Cloud “”. Within this folder, there will be a sub-folder with the name “Project_Files:” This is where you should put the source files you wish to be rendered. Your files can be archived or native application scenes.
Please re-create a new folder in Boost Cloud root folder and re-name it to “Project_Files”.
Step 2 (Packaging Scene Files)
Files that are supported for this software are files with “.blend” extensions. If you have projects that have to do with texture maps or other external stuff you should turn on “Automatically Pack into .blend”.
How to Archive Blender Scene?
Open “File” Menu go to "External Data" and select “Automatically Pack into .Blend” and then "Save " your scene, for large projects we strongly suggest to you pack files into RAR instead of ZIP file.
Step 3 (Submission):
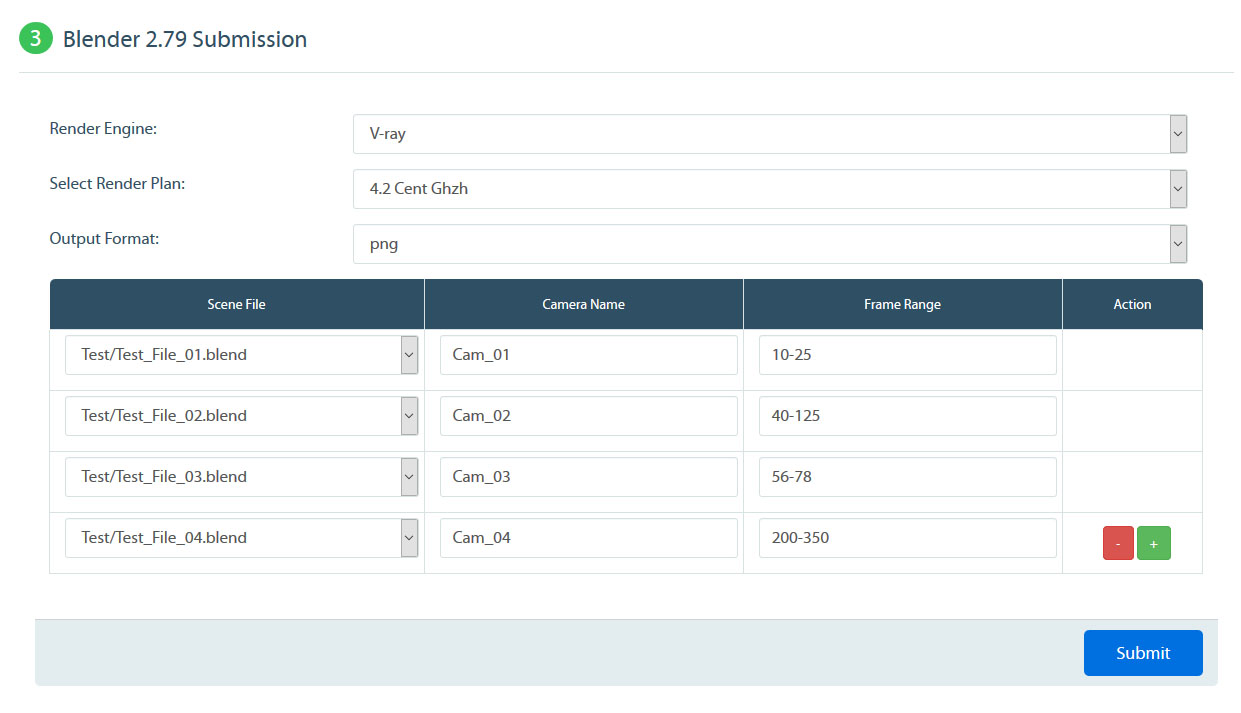
The first thing you need to do is to log in to your user panel. Then, select Blender render farm(Manual farm) submission and choose your version of Blender – this should be based on your file settings.

The inputs below are the essential submission details you will be required to fill before submitting your files. There is also a professional scene selection structured to allow you to submit multiple scene files with different camera names as well as frame range at the same time.
Job Statuses (Monitoring):
After successfully completing the above requirements all you need to do is to lean back and monitor the rendering progress.
Below is a list of relevant job status that will tell you what’s happening at each stage;
Under Review
At this stage, your files are reviewed technically to ensure that there are no problems with them. If there is an issue with your files, you will be notified through a ticket.
Cost Estimate
We usually render a few frames to determine the overall cost. For an animation project, the rendered frames will be shared with you so that you can check the result before making a final approval. As for still frames, we do not share the result. So, you have to make sure that you have carried out all tests at your end before submission.
Pay & Active
After estimating the cost, a quote with the total cost will be sent to you. And if it fits your budget, you can then go ahead to activate your order. You should know that for manual submissions, all payments
will be processed upfront from your account. You should also endeavor to have sufficient funds to activate your jobs.
If you notice any issues with the test frames or the estimated cost, please kindly use the report button to let us know there is a problem.
Queued
As soon as your order is activated, our system will put your files inline to be rendered.
Rendering
When this status comes up, it means your project is rendering. To check your render progress, you can look at the cloud folder because all renders synchronize simultaneously with your cloud folder. You can also see your rendering progress from the user panel. All the same, you will still be notified after your rendering has been completed.
